A Hallway Refresh + IKEA Hemnes Hack!
Well we definitely started the year off with a banger project, and man does it feel good to have a functional space! This hallway leads to our backyard and was always cluttered with shoes and a dog towel (to dry off those messy paws) and whatever else just landed here. We really needed to find a way to organize and clean up this narrow hallway and now it feels bigger than ever!
Check out this blank canvas of a before…
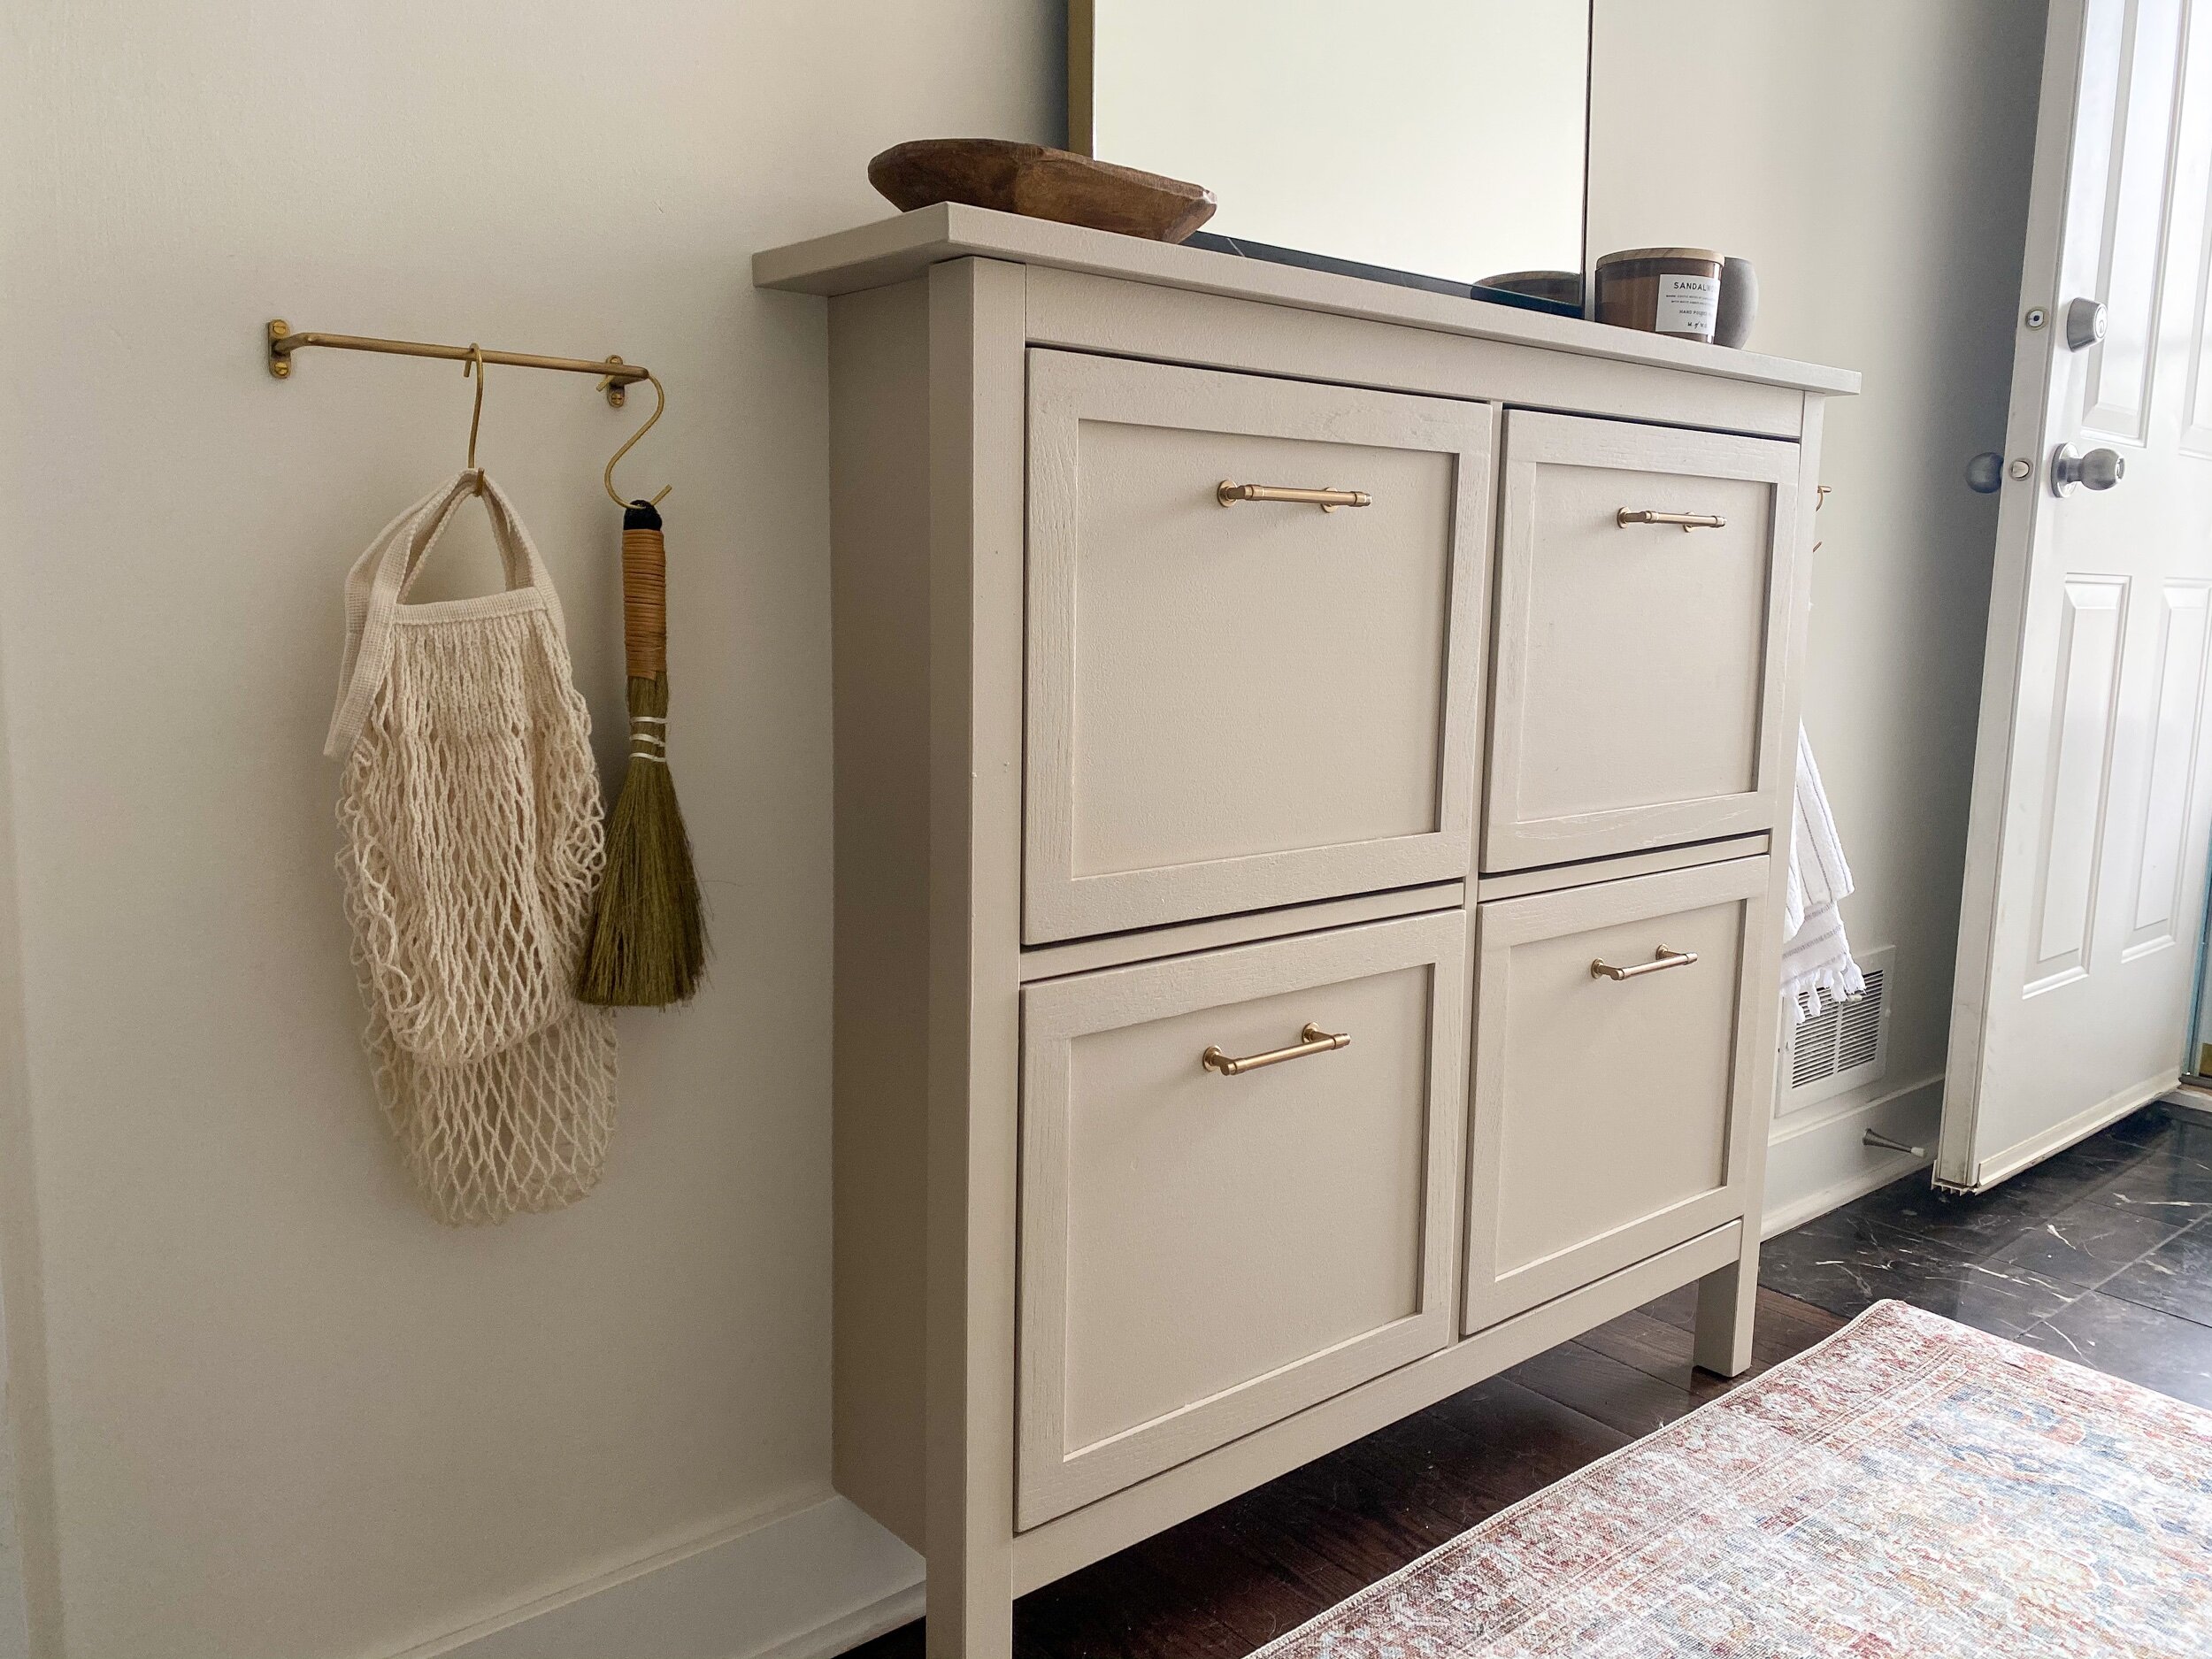
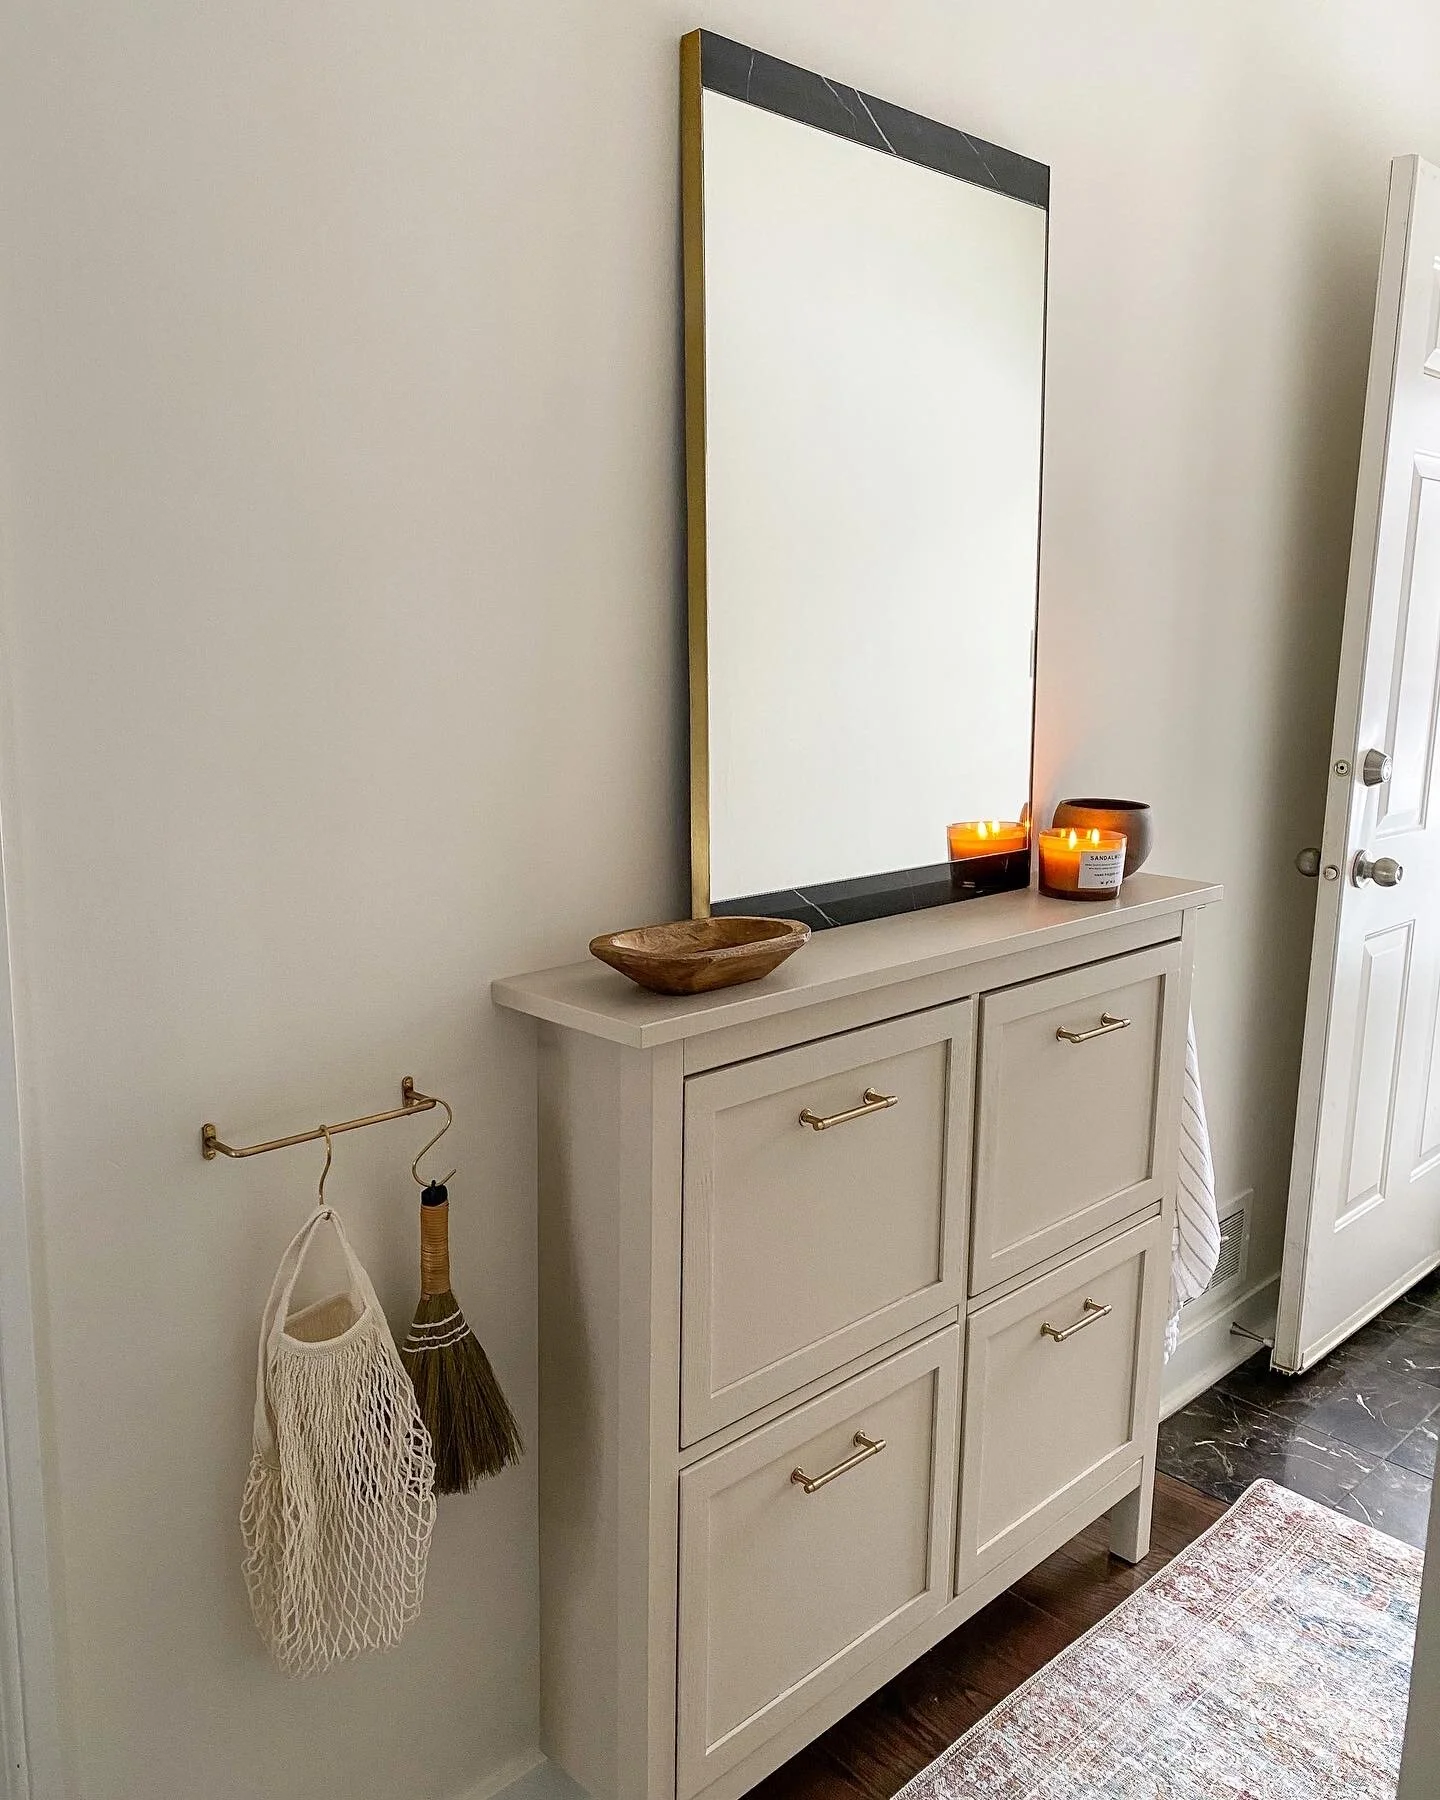
And a pretty organized after!
A before from the other angle…
And after! Ahh it’s just so so much better!
So after battling with Ikea’s click and collect service, we were finally able to order this Hemnes shoe cabinet in black-brown. This cabinet is perfect for a narrow hallway and provides some decent storage for shoes and other essentials! I knew we were going to be painting the cabinet, so we made sure to order either the black-brown or the grey version because they are actually made with solid pine and much easier to paint.
We wanted to paint every piece fully before we assembled it so that the interior of the cabinet was the same colour as the exterior and it was completely seamless. So we started with one coat of primer that we had on hand (we used Bulls Eye 123). We should have filled the predrilled holes for the hardware at this stage… but we forgot… so we did it after we primed the drawer fronts and it still worked out well. Also if you are painting any white Ikea furniture (that has the white plastic edging), this BIN Primer works really well to grab and hold the paint.
After a second coat of primer, the coverage was so much better and we were ready to add on the trim to the drawer fronts!
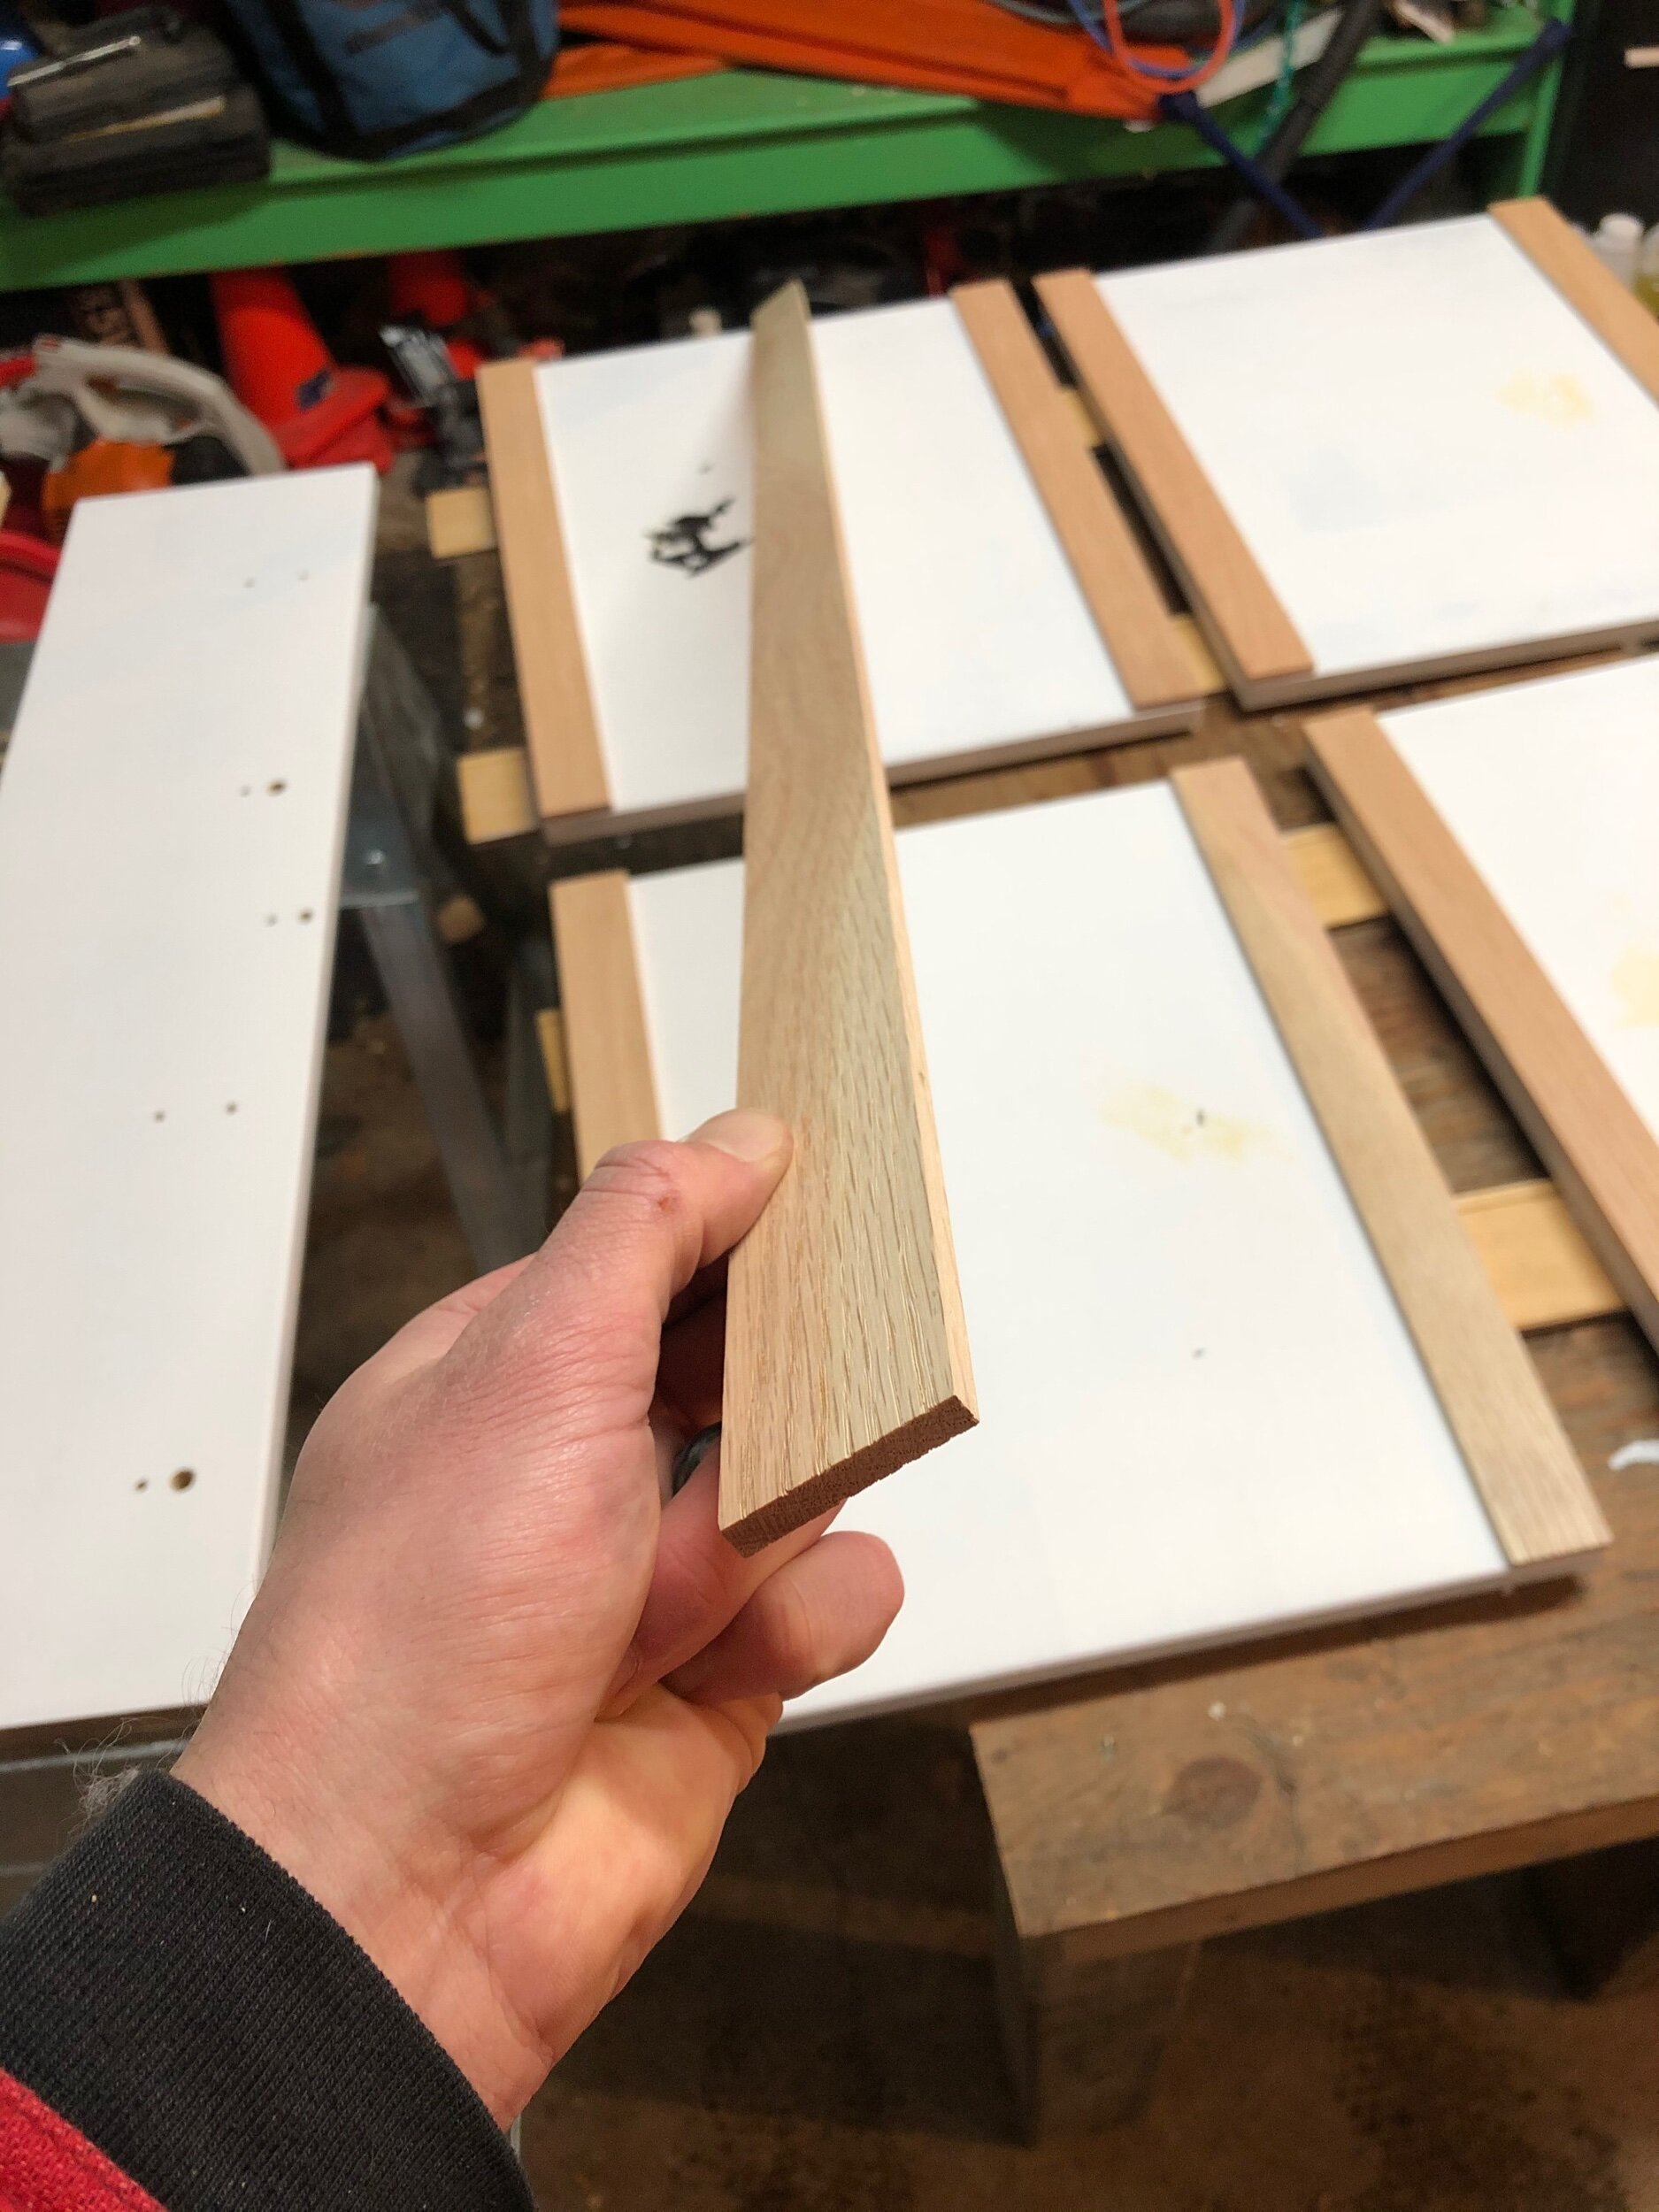
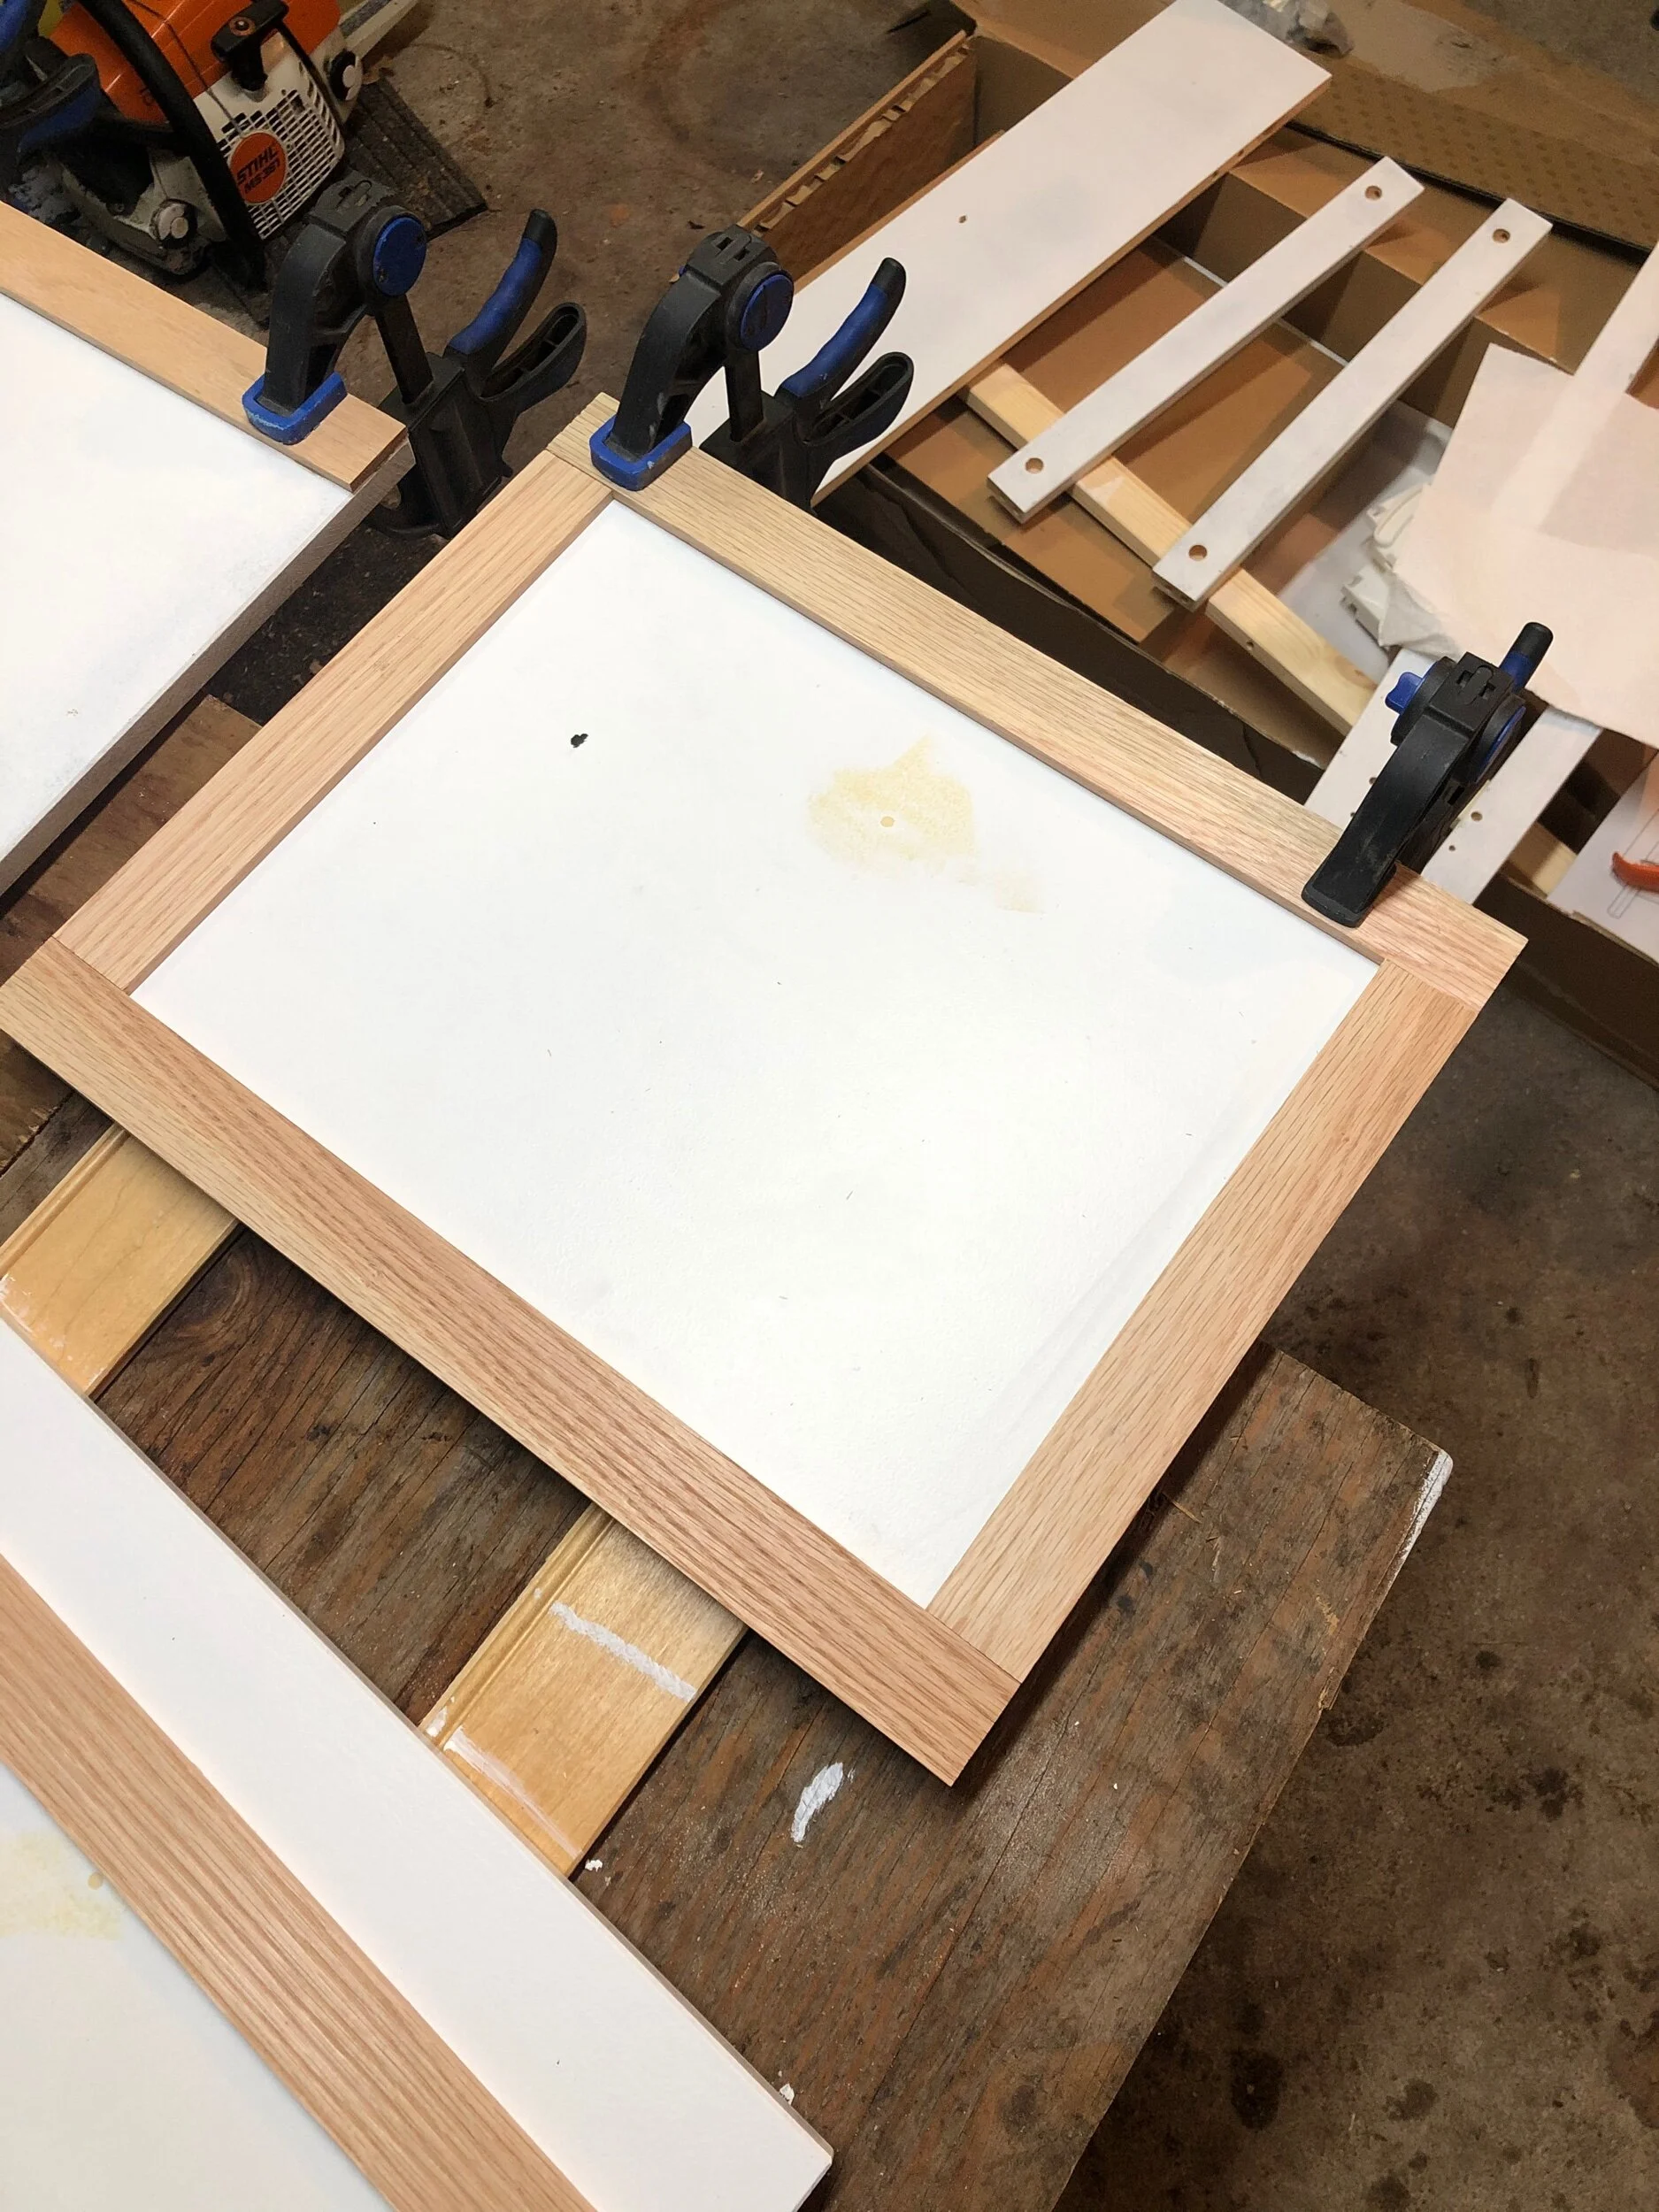
We got this skinny 1/4” x 1-1/2” oak trim from Lowe’s and attached it to the drawer fronts with adhesive and a pin nailer.
The ikea drawer fronts have a slight bevel around the front edge, so we filled that gap with wood fill and gave it a light sanding before painting! You can see the line of wood fill that’s between the dark base and the oak trim below. Filling in all these little gaps just elevates the drawer fronts and is worth the extra work! We painted every side of every piece with two coats of Valspar Signature paint and primer (from Lowe’s), in an eggshell finish, tinted to Benjamin Moore Stone Hearth - the most perfect ever mushroom colour!
After a night of letting the paint dry and cure, we were ready to assemble!
The drawer fronts looked so pretty after they dried, the perfect greige, muted, mushroomy goodness! We needed to drill new holes for the brass hardware that we ordered from Wayfair, so we made a quick template with some plain paper that fit between the trim and it made the hardware placement so easy!
Side note, double check that all the drawer fronts are facing the same way before you drill new holes, it would be so easy to have one accidentally upside down and then the Ikea basket would end up upside down, eeek!
Once the cabinet was installed we added some small brass bars (with these brass S hooks) on either side to hold some grocery bags, a small brush for our fireplace and our dog towel. I found this wood dough bowl from the cutest local shop on IG - Stone and Ivory, and it serves as a beautiful catch all for this spot!
As soon as Chris Loves Julia came out with their Loloi Rug collection I knew I had to have one, and the Lagoon Brick rug from the Jules collection made my heart sing! We got a 2x5’ runner and it fits the hallway perfectly! This hallway is only 3 feet wide for reference.
Creating a space for items that were always in the way really helped to improve the organization of our home. The mix of closed and open storage in the hallway helps hide away our not-so-pretty items like dog booties and gardening shoes, while keeping this narrow space feeling open and airy at the same time, a true functional improvement and we couldn’t be happier!


